Tuesday 26 April 2011

pictures!

ok, went a while without access to a camera there, but now i finally managed it. :P

I made the coaming, with a flange all the way around:

Photobucket

it doesn't look too good in the back, but I'll smooth it over when i finish it, i had to put an extra piece of wood on there to hold it together that I'm planning on removing when i stich it together.

The finished frame:
Photobucket

Photobucket

and i think the masik is strong enough even though i cut it out of a straight piece instead of the curved one:
Photobucket

next weekend: skinning! :D

Wednesday 13 April 2011

Frame Finished!

I went out last night and put on the forward deck stringer, which means the frame is officially finished.

Work still needing to be done:
Oiling the frame (possibly twice)
Bending the coaming (the ring that will be around my waist)
Sewing on the skin.
Painting the skin to waterproof it.

I will upload some pictures of the finished frame next friday when i go out to oil it.

Monday 11 April 2011

evening work

I went out again yesterday after work, picked up some more wood on the way, and cut the masik out of a 12x5 cm plank of fir.
It's not as strong as it could be, but it's strong enough for me to be able to stand on it without problems.

I also made the deck ridges behind me and cut the one's in front of me to lenght, but didn't have time to finish them, though I'm considering going out and doing that today so I have the frame finished.

no pictures unfortunately :P

Day 7 and 8

Kind of a slow annoying weekend...

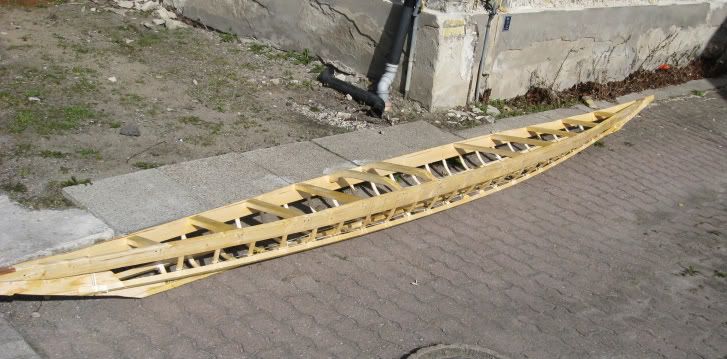
I went out saturday, and made the two arched deck beams with no problems, then I started on the masik with the large curved piece of lumber I'd found.

Photobucket

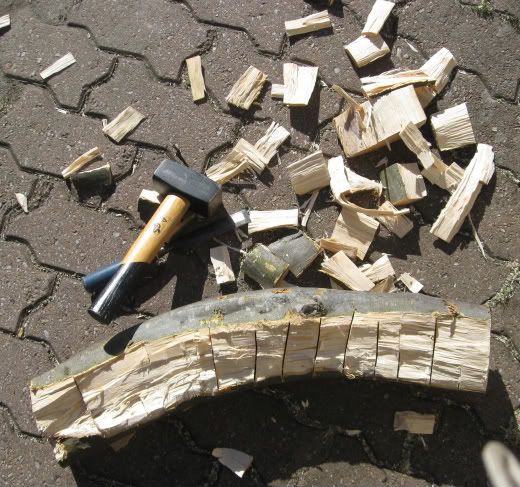
I've reached the conclusion that it is probably easier to do that with a bandsaw, and that it's practically impossible with a handsaw, as i spent 3 hours working on it, making kerfs and hacking the wood off, and didn't get a proper flat surface, and in the end I think I took too much off it in some places and decided to give up on it.

then I tried putting the skin over the kayak, to make sure it fit.
I clamped it in one end, and pulled it over the kayak, and about 70 cm before reaching the other end the cloth ended...

Photobucket

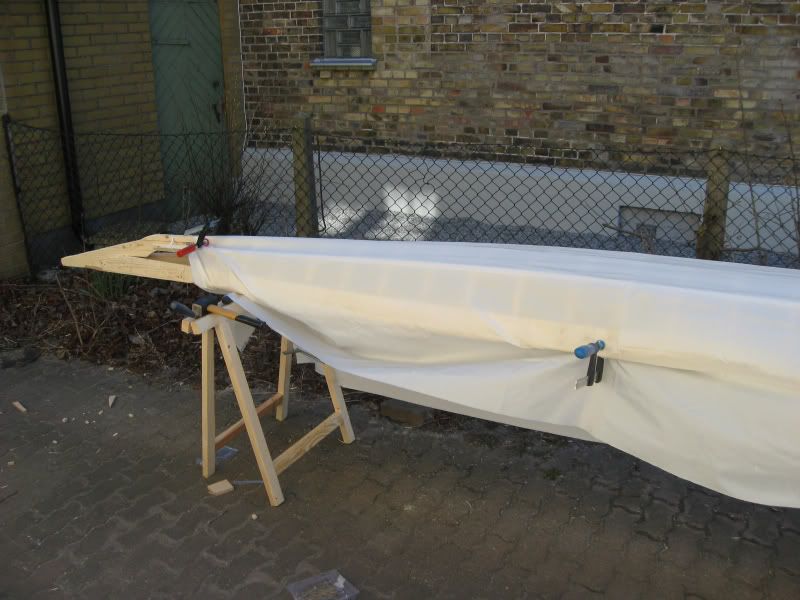
I've mailed the guy I bought it off and he will send me a new piece on thursday, so it should get here before easter.

Sunday I was planning on getting the plank I intended to make into a second paddle, and use a piece of that for the masik, but when I went out to the hallway where I had it, it was missing...
Apparently someone stole a 2m plank of wood with half of one side chipped off...
And of course the lumberyard is closed on sundays, so I couldn't go buy a new piece either.

In the end I settled for oiling the frame with raw linseed oil and going home.

Photobucket

Monday 4 April 2011

I went out Sunday, and had a bit of trouble, because i forgot to bring the book.
however, I've read most of it a few times now, and read lots of other blogs, so i forged on.

I messed up the first stem piece I tried I messed up, because I forgot that it had to go all the way to the top of the gunwales, but i could use the piece to make the other stempiece so in the end i got two functional pieces.

Photobucket

Photobucket

I clamped the keel on, and started lashing it.
as i didn't have the book i didn't use the exact lashing method he suggests, and i used a thread that wasn't completely flat (1,4mm thick polyester building line).
but the lashing went fast and painless, there was one point on one chine when i needed fairing blocks on 3 ribs in a row, but apart from that it was no problems.

Photobucket

Photobucket

I also made one of the little blocks that tie together the stemplate and gunwhales, but didn't have time to do the other.

Photobucket


all in all, I think I got a good days work done.

Photobucket

EDIT: Picked upp the cloth at the post office too!

Photobucket